Hey again! I have two new videos showing my December Daily Process that I wanted to share with you. :) Thank you for stopping by today! Have a fabulous holiday weekend! Thank a Veteran tomorrow if you can!

Sunday, November 10, 2013
Monday, November 4, 2013
December Daily 2013 using Ephemera's Vintage Garden~Videos!
Heeeyyyyyy everyone! So happy you stopped by today! I have been a busy bee working on my December Daily (base pages) and recording process videos for you! I made my covers from a pasta box that had a cute window cut out in the front. I love the fact that I will be able to see the first page of my DD. I am using the DCWV Heirloom Christmas Stack and the Days of December printable journal kit from Ephemera's Vintage Garden. This kit comes with so much and is only $8.95!! So here are just a few pictures of what I've done so far, but if you want to see what I've done in it's entirety, go check out my two videos. I will provide them at the bottom of this post.

 In the photo above, I am using shipping tags from Staples, old book pages that I tore out of an old book, kraft cardstock from Joann Fabrics, a doily and bakers twine.
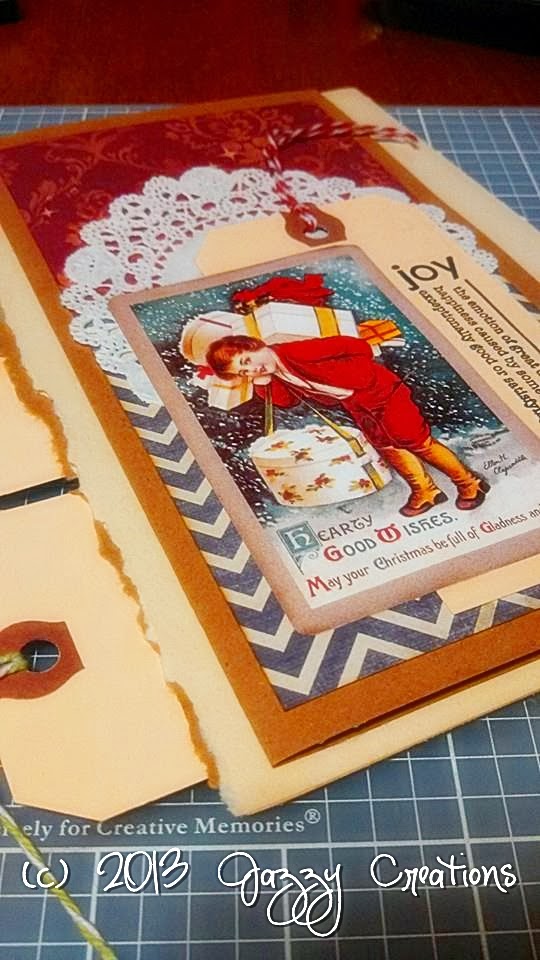
 In the photo above, I am using a kraft envelope from Michaels, a doily and a journal spot from the Days of December Journal Kit.
 In the photo above, I love the addition of paint samples!! Go to your local Lowes, or Home Depot, or wherever they sell paint, and pick up a few! The tag and library pocket are from the Days of December Kit, and I added some washi tape from my stash.


Thanks for stopping by!! Here are my videos, there are two so far!
Wednesday, October 30, 2013
December Daily 2013 using Ephemera's Vintage Garden
Hi Everyone! Can you believe we are talking about December Dailies already?? Where did this year go?? Time just flies, doesn't it? So I am gathering my supplies for my December Daily and posted a video today of the fabulous kit I will be using from Ephemera's Vintage Garden! It's called Days of December Printable Journal Kit, and it's ONLY $8.95!! I will also be using the Days of December Planner Kit which is ONLY $5.95.

I will be doing a process video showing how I will put together my DD. I am not sure if it will just be 1 video or a couple. The video I posted today shows the supplies I will use. If you'd like to make one right along with me, that would be great! If you'd like to use the same kits, go visit Debbie and download your copy! You won't be disappointed. She also has another new kit called Christmas Whimsy. This kit includes pink and teal in the design. Here is the Planner Kit for Christmas Whimsy. Both designs are awesome though so you can't go wrong.
Thank you for visiting me today. Here is the video I posted on you tube. Enjoy the rest of your week!
Friday, October 25, 2013
Small Journal with Vibrant Hand Dyed Pages-Available!
Happy Friday to you! I have a new handmade journal to share with you! I absolutely LOVE the end result on this one! I hand dyed all the pages, as well as, the cover and muslin ribbon. It is vibrant yet has a wonderful vintage feel. I distressed all the edges of the pages, which are card stock. I added some stamping to the pages as well. I'm so in love with this journal but it is available for purchase!! $39.00 US currency + shipping. It measures 5" x 6" and is 2.25" thick. There are 8 signatures; 92 TOTAL pages. This journal is fabulously tactile!! You can also visit my Zibbet Shop to view this listing.


 Thank you so much for stopping by today! If you have any questions about this journal please don't hesitate to ask!


Monday, September 23, 2013
December Daily-Photo Heavy!
So I finally photographed my December Daily from last year! I must say taking these photos makes me want to finish it. Orrrr, make a new one for this year, with some changes. I really love the flaps and pockets; I just should have not numbered anything yet. My biggest gripe on this project is how thick it is without any spines. As I filled it, it got more bowed out. I have seen some that look like large tubes when they are completed! LOL. Soooo, if I attempted this again, it would definitely have chipboard covers and a spine with some sort of hinge binding. But here's the photos.... be warned, this will be photo heavy!
This project was made with file folders using Kathy Orta's you tube series of tutorials. It is called a Lap Book. As you can see, the covers are not decorated. My plan was to complete the "guts" and then decorate the covers that way the covers wouldn't get dirty during my process.

In the picture below, you see it is already about 2 inches thick, if not more!


So that's it! That's my unfinished December Daily! When I look at how much effort I put into this I definitely don't want to do another one, EVER! LOL! Waaaayyyyyy too much work for my very first attempt at a December Daily! Maybe someday I can make use of it somehow. For now, I will move onto my December Daily for 2013. I have so many ideas in my head, I am having a hard time deciding what to do!
Thank you so much for stopping by! In case you missed my other post with my videos, here they are on the above project!! Have a wonderful week!!
This project was made with file folders using Kathy Orta's you tube series of tutorials. It is called a Lap Book. As you can see, the covers are not decorated. My plan was to complete the "guts" and then decorate the covers that way the covers wouldn't get dirty during my process.

In the picture below, you see it is already about 2 inches thick, if not more!

Here is what you see when you open the covers, the flaps. I wanted to start my Daily from Thanksgiving because I wanted to document the picking, cutting, and putting up of the Christmas Tree. We do that on Thanksgiving weekend. Along the side, you see the words, "Thanksgiving Day." Behind that, is a large pocket that houses a large portfolio meant for Thanksgiving pictures (I never put them in). The numbers I cut from my silhouette Cameo, as well as the trees, the Christmas ornaments and all the fonts.

Here is the portfolio that is stored in the large Thanksgiving Day pocket.

Here is a close up of the diecuts. I really love how the numbers turned out. They are about 2 inches in diameter, including the snowflake backgrounds.

Under the 23rd, is space for more photos.

Here is a close up of the ornaments.

Under the number 24, is another space for a photo.

Yup our tree did actually fall down! LOL!


This is the back of the front cover flap on the right side. The number 28 is on a very tall portfolio type tag. Just below the 27, is another pocket for a tag.

Below the number 27 is a flap. Under that flap is day 26, of November.


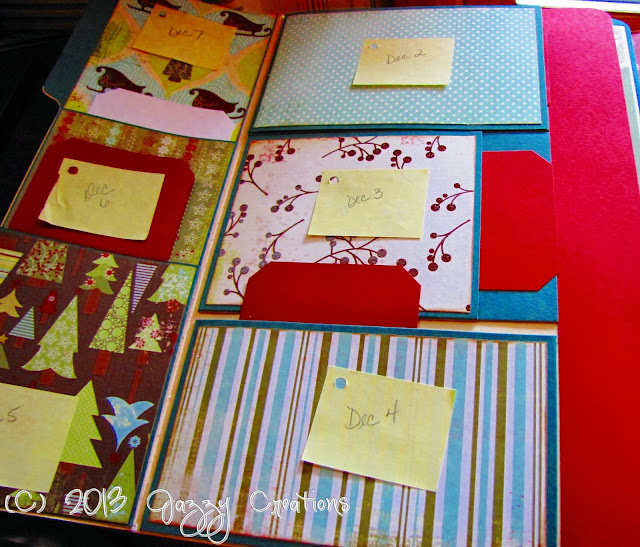
This is the back side of the left front cover flap. I didn't continue with the numbers on this side, so you see the sticky notes. There are two pockets on this side as well. 

This is the section once you flip open the Thanksgiving section. Lots of pockets and places for tags.


This is the large back pocket at the back once all the flaps and sections are opened.

There are so many places to stick tags and photos.... this book never ends!


So that's it! That's my unfinished December Daily! When I look at how much effort I put into this I definitely don't want to do another one, EVER! LOL! Waaaayyyyyy too much work for my very first attempt at a December Daily! Maybe someday I can make use of it somehow. For now, I will move onto my December Daily for 2013. I have so many ideas in my head, I am having a hard time deciding what to do!
Thank you so much for stopping by! In case you missed my other post with my videos, here they are on the above project!! Have a wonderful week!!
Sunday, September 22, 2013
December Daily
Happy Sunday to you! Thanks for stopping by! I realized after I mentioned my December Daily 2012, that I never showed my DD last year! OMG, I'm so crazy! LOL. I didn't take pictures of it but I did do three videos of it. I will take some pictures of it this week to share with you. Who knows, I may decide to attempt this style DD again this year!
Thanks for visiting me today. Stay tuned for pictures this week!
Thursday, September 19, 2013
Recovering from Surgery...
Hey Everyone! I miss sharing projects with you but I'm on a bit of a hiatus right now; recovering from surgery two weeks ago. I am almost back to being able to sit and be crafty but it's definitely taking some time.
Has anyone thought about doing a December Daily yet?? I know we're only into September but if you've ever done one before, you know that the key to actually completing a December Daily is preparation!! Having the album part done ahead of time and having a plan is soooo important. The more preparing you do ahead of time, the more likely you are finish it. I can say this because I tried, and failed, miserably last year! LOL! I tried the December Daily Lapbook that Kathy Orta designed, and I actually got the base of the album completed and started even decorating pages BUT part of my problem was numbering the pages AHEAD OF TIME! I should never have done that because I couldn't commit to something that I had to do daily. And I was restricting myself as far as photo placement. So this year I will do a December Daily in a different style and I won't adhere my numbers down ahead of time! But I AM excited to do one this year and complete it! LOL.
Anyway, I hope you are having a lovely September! Fall is almost here! I can feel it in the air and I'm so excited!! :)
Thanks for stopping by!!
Saturday, August 31, 2013
Video for Ephemera's Vintage Garden Journal!
Hi Everyone! Thanks for visiting me today! I hope you are all having a wonderful weekend so far! I have uploaded my video for my recent journal! I hope you can check it out!! Quick post today as I am working on more projects! Happy crafting!
Tuesday, August 20, 2013
Design Team Project for Ephemera's Vintage Garden~Tea and Tweets!
Happy Tuesday! Thank you all for visiting me today! It's been such a beautiful summer, I've been spending a lot of time outdoors! I hope you are enjoying your summer weather, or winter weather if you're in another part of the world!
Today I have an August Design Team project for Ephemera's Vintage Garden! I am using the new digital kit called Tea and Tweets, and let me tell you how colorful and wonderful this kit is!! It's amazing!! I let the paper do all the work for me in this project. I printed the kit at Staples on matte photo paper, card stock thickness. I used the ENTIRE kit; all the pages, all the ephemera, every last bit! You get a lot in this kit to work with, so if you haven't checked it out, run over and take a peek at it. You won't be disappointed!
I made an envelope journal and bound it with my Cinch. The covers are 8 3/8" x 6 5/8". I didn't add any embellishments to the front cover, leaving the paper to speak for itself. I used a red coil in the binding because it matched beautifully with the papers. I also tied several pieces of hand-dyed muslin onto the coil.
 The papers print on 8.5" x 11" sheets of paper. You can either fold the paper in half and make a top-loading pocket out of the page, or you can do as I did and cut the paper in half. I used the design papers on adjacent pages so the cute stitching design around the perimeter would match up from page to page. On the front inside cover, I added one half of the design paper, followed by a belly band which holds one of the envelopes you cut out and assemble. On the belly band is a ticket that comes in the kit. It already has the jagged edges in the design! On the second page, I added a belly band using torn edges (cardstock) and then a piece of the design paper.
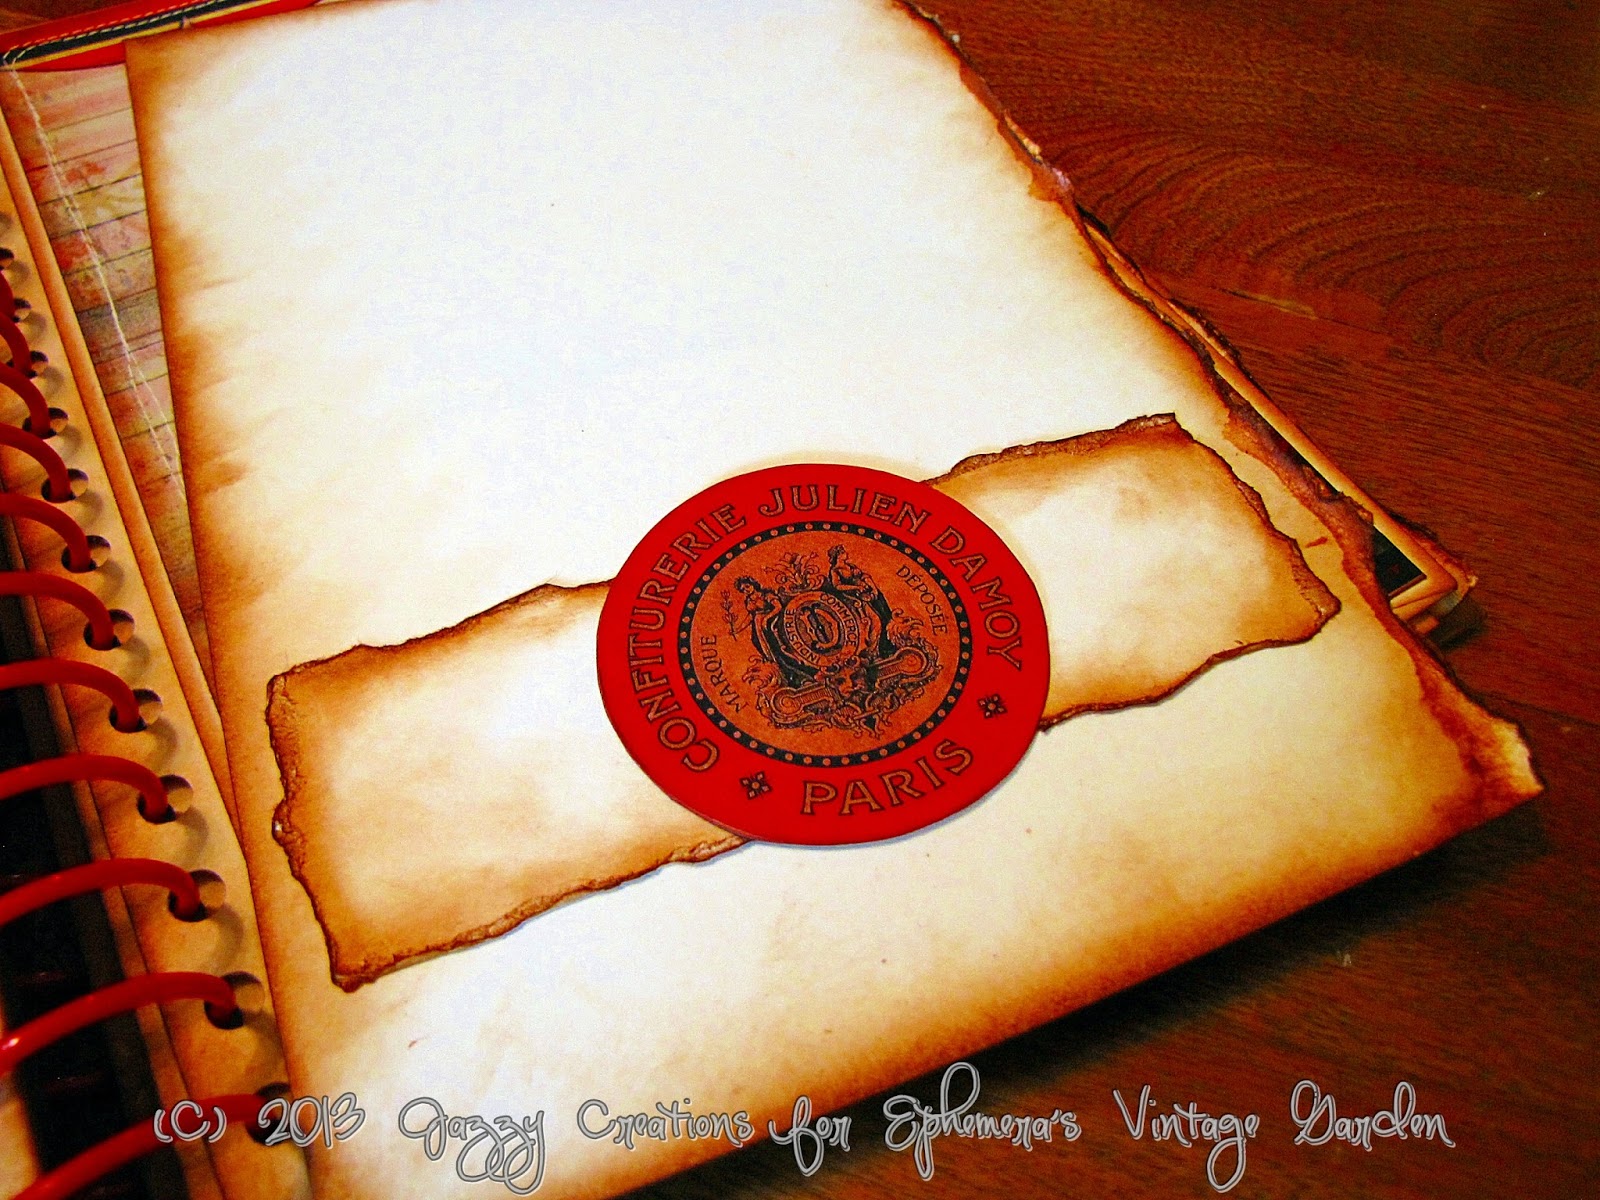
 Each page is made from a large envelope (approximately 6"x9", which I then cut down to to go with the papers) which makes for a perfect pocket. In each pocket, I just used vanilla colored cardstock and tore the right edge. I then heavily distressed them with Tim Holtz Vintage Photo Distress Ink.


In the photo above, you see the cardstock pulled out from the envelope pocket and you can see more torn cardstock with an ephemera piece from the kit attached to it. This piece is then attached to the larger piece of cardstock just along the bottom and right sides to form a pocket on the page.
In the photo below, I show what I added to the back of this cardstock pull out; another envelope from the kit, a little file folder piece inside the envelope, and they are both tucked into a pocket. The piece you see on the pocket is from a free printout called Spring Tea.
 On these two pages, you see the amazing art and vibrant colors of this Tea and Tweets kit. The exact colors will differ from printer to printer, and paper to paper, so it may look different to you here than on Debbie's site.
 Here is the insert for this page. I have a belly band and a post card from the Spring Tea free printable set.

 And here is the flip side....
 Love the doilies in the background of these two pages....

 LOVE the journaling lines already in the design, and the "washi tape" across the top of the pages (photo above). SO much detail in this printable kit!!
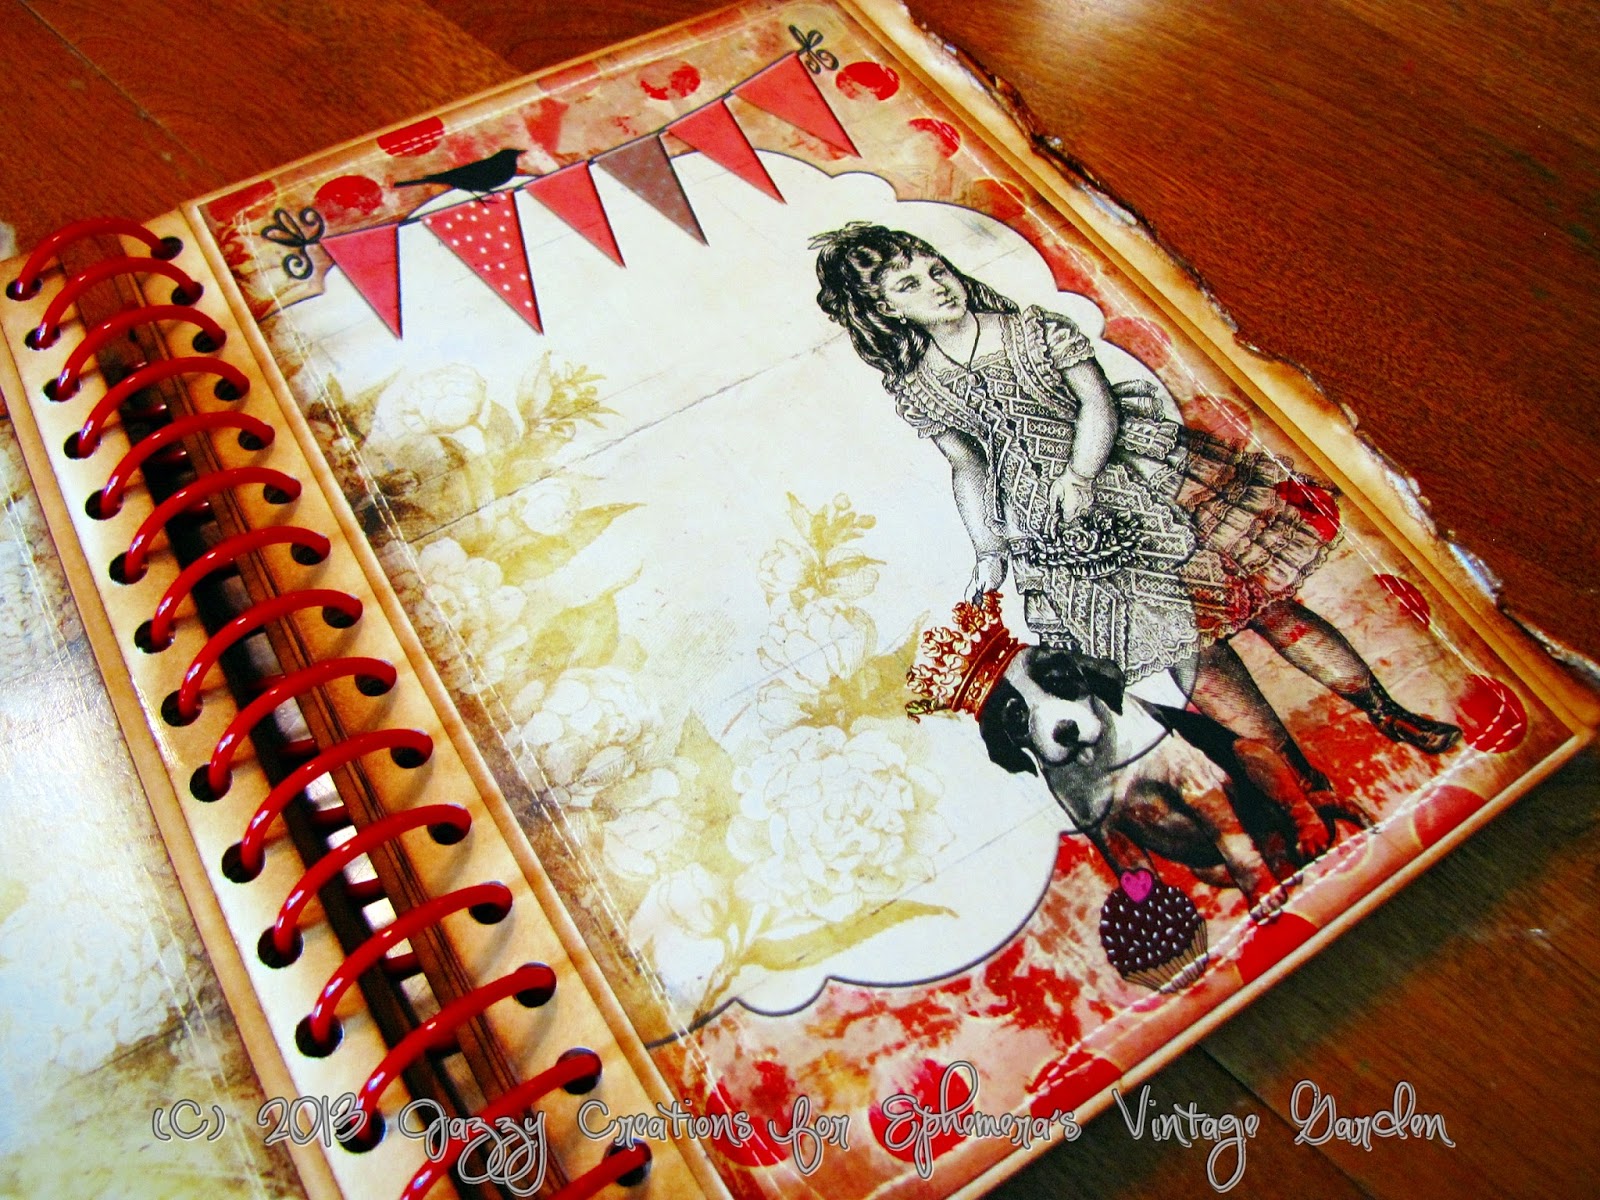
Isn't this a sweet little girl with her dog? You could attached letters in the pennants to make a title for this page as well.
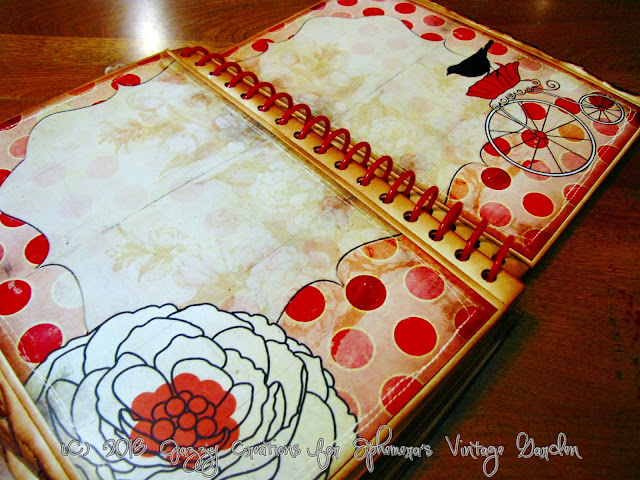
 Isn't this paper gorgeous?!! I just loved working with this kit! You don't have to do anything on these pages, except to add your photos!
 This is the insert for the page above. I love the lines on it so it makes a wonderful journal spot!
 Here, I added a belly band to the page, so I could tuck in a letter or a picture...

 Here is the back inside cover (photo below). I adhered two envelopes to the inside cover, actually. One envelope's opening is at the top of the page, and the second opening is just below that circle piece. I can then write on the lines about what may be tucked into those pockets.
On the last page, you see I added this cute file foler that comes in the kit. I glued it shut so it forms a top loading pocket on the page. I then added a circle ephemera piece to the center.

I LOVED this kit!! I can't tell you enough how gorgeous these papers are! I hope that you go check out Ephemera's Vintage Garden and look at this Journal Kit along with all the other amazing digital designs she offers! Thank you so much for visiting me today and I hope you have a wonderful day, wherever you may be!!
Today I have an August Design Team project for Ephemera's Vintage Garden! I am using the new digital kit called Tea and Tweets, and let me tell you how colorful and wonderful this kit is!! It's amazing!! I let the paper do all the work for me in this project. I printed the kit at Staples on matte photo paper, card stock thickness. I used the ENTIRE kit; all the pages, all the ephemera, every last bit! You get a lot in this kit to work with, so if you haven't checked it out, run over and take a peek at it. You won't be disappointed!
I made an envelope journal and bound it with my Cinch. The covers are 8 3/8" x 6 5/8". I didn't add any embellishments to the front cover, leaving the paper to speak for itself. I used a red coil in the binding because it matched beautifully with the papers. I also tied several pieces of hand-dyed muslin onto the coil.


In the photo above, you see the cardstock pulled out from the envelope pocket and you can see more torn cardstock with an ephemera piece from the kit attached to it. This piece is then attached to the larger piece of cardstock just along the bottom and right sides to form a pocket on the page.
In the photo below, I show what I added to the back of this cardstock pull out; another envelope from the kit, a little file folder piece inside the envelope, and they are both tucked into a pocket. The piece you see on the pocket is from a free printout called Spring Tea.


Isn't this a sweet little girl with her dog? You could attached letters in the pennants to make a title for this page as well.


On the last page, you see I added this cute file foler that comes in the kit. I glued it shut so it forms a top loading pocket on the page. I then added a circle ephemera piece to the center.

I LOVED this kit!! I can't tell you enough how gorgeous these papers are! I hope that you go check out Ephemera's Vintage Garden and look at this Journal Kit along with all the other amazing digital designs she offers! Thank you so much for visiting me today and I hope you have a wonderful day, wherever you may be!!
VIDEO COMING SOON!!
Subscribe to:
Posts (Atom)